Updated
—
7 min read
How to Add Cloudflare Turnstile to Next.js 14
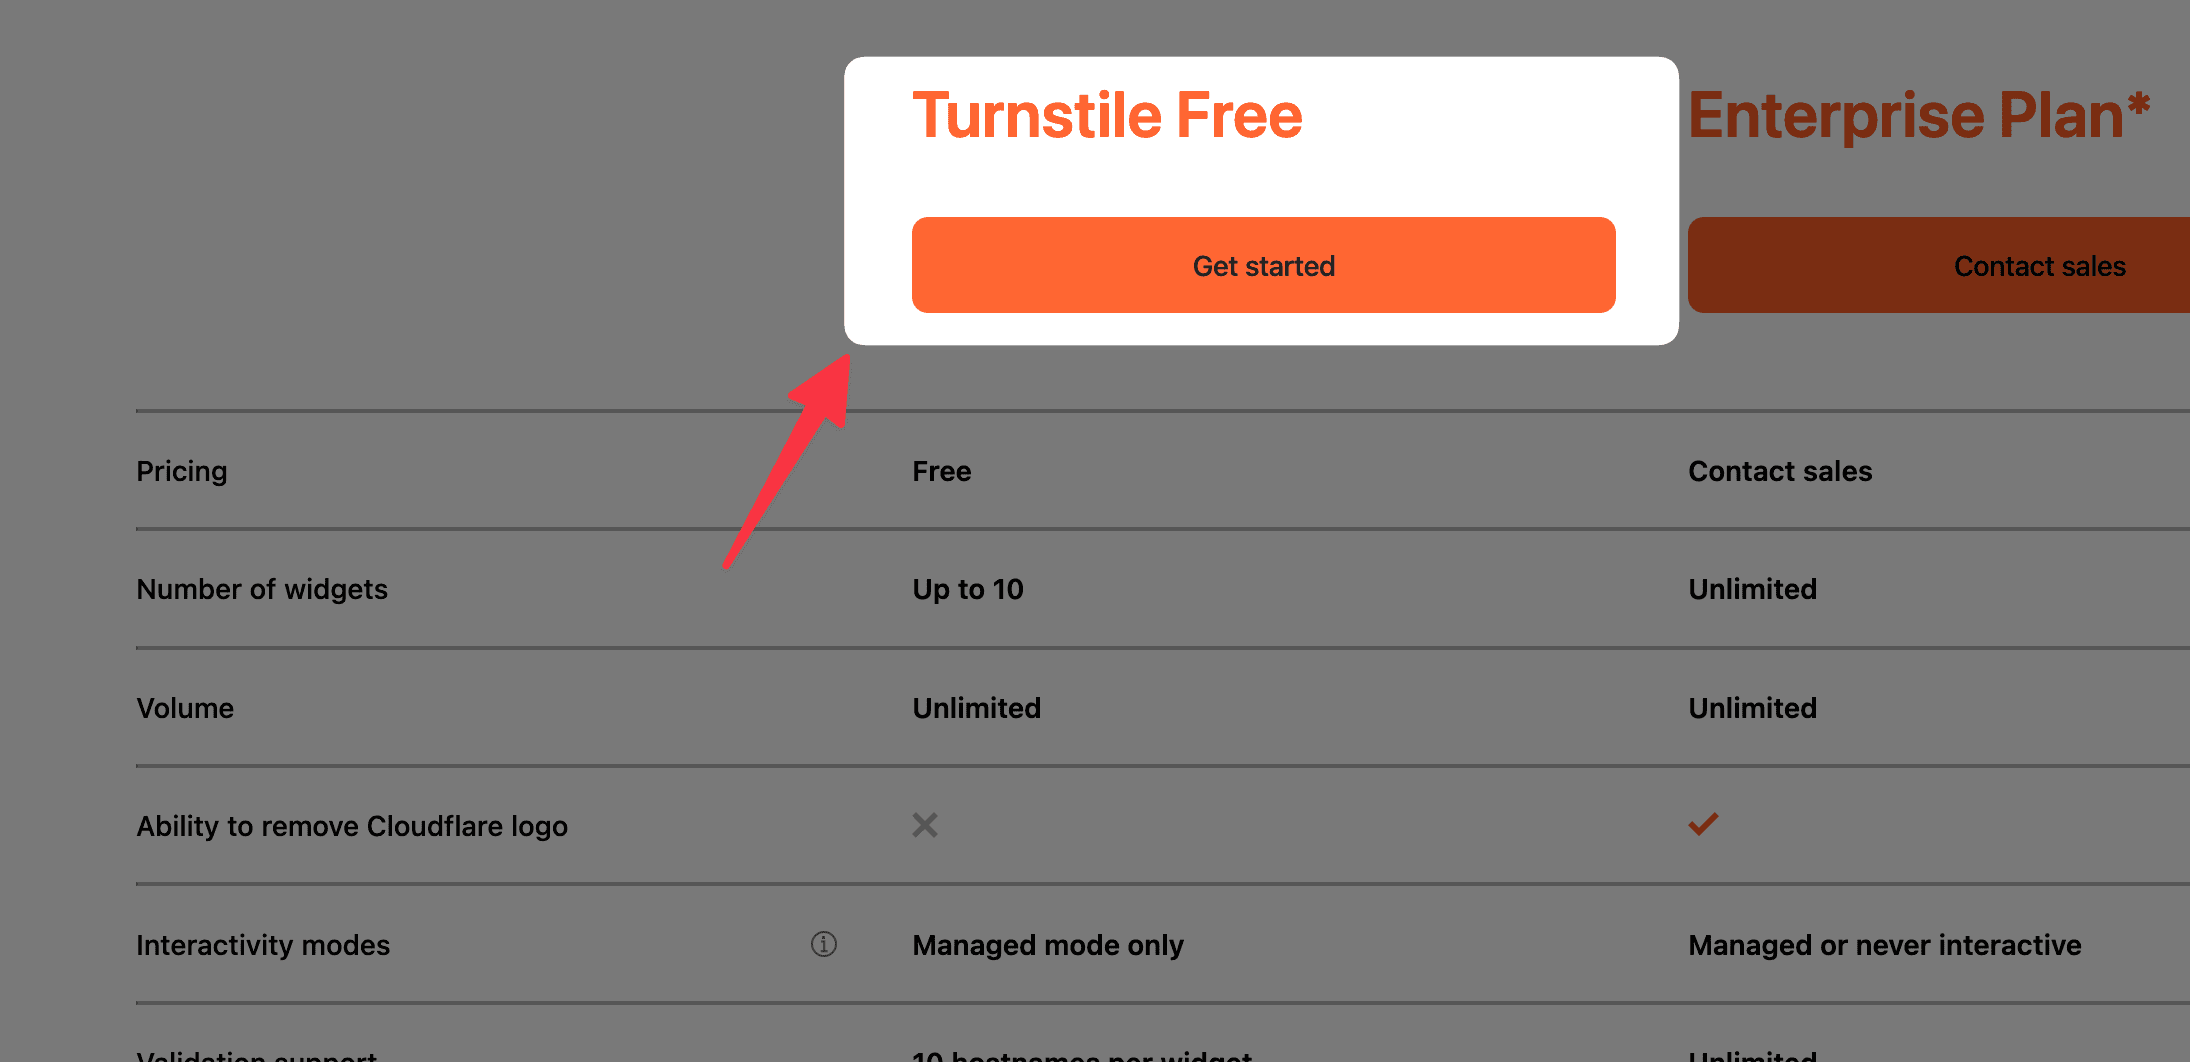
I use Cloudflare Turnstile on this very site. It's been a helpful tool to avoid bot form submissions.
Best of all, it is free with unlimited volume.
Here's a quick tutorial on integrating Cloudflare Turnstile with Next.js. While the process is simple, there are some nuances which are important to note which I've discovered over time.
1. Create a Cloudflare Turnstile Widget
Create a free account for Cloudflare Turnstile or sign in if you already have one.
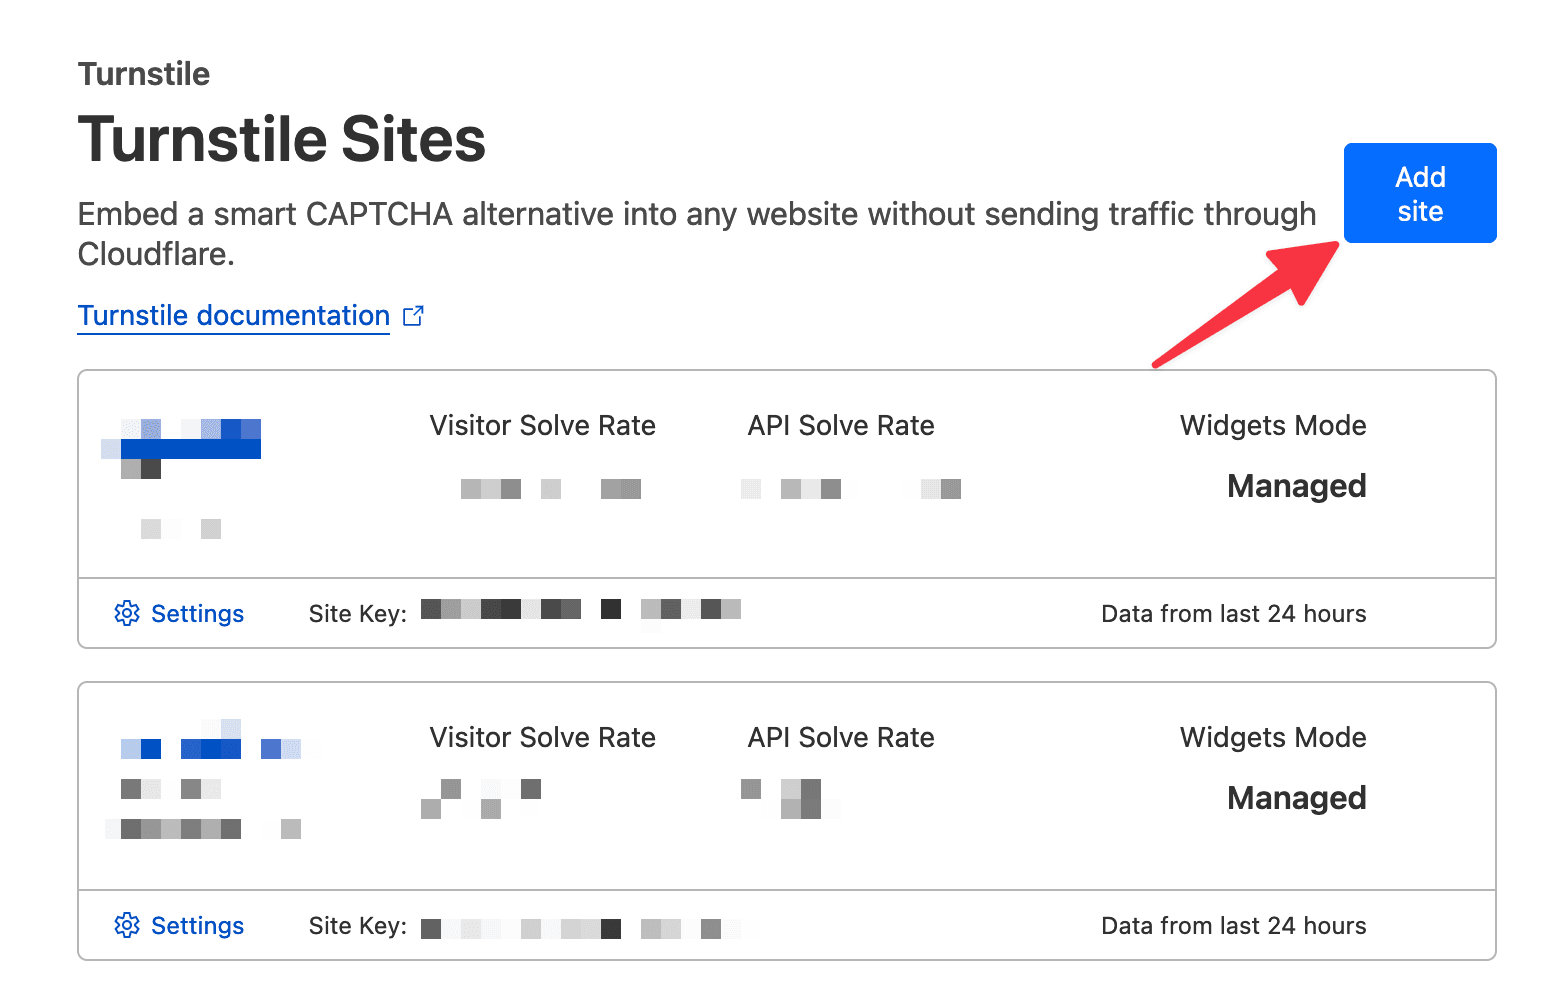
Click "Add Site" to create a new widget. Make sure to include your (1) production domain and (2) localhost.
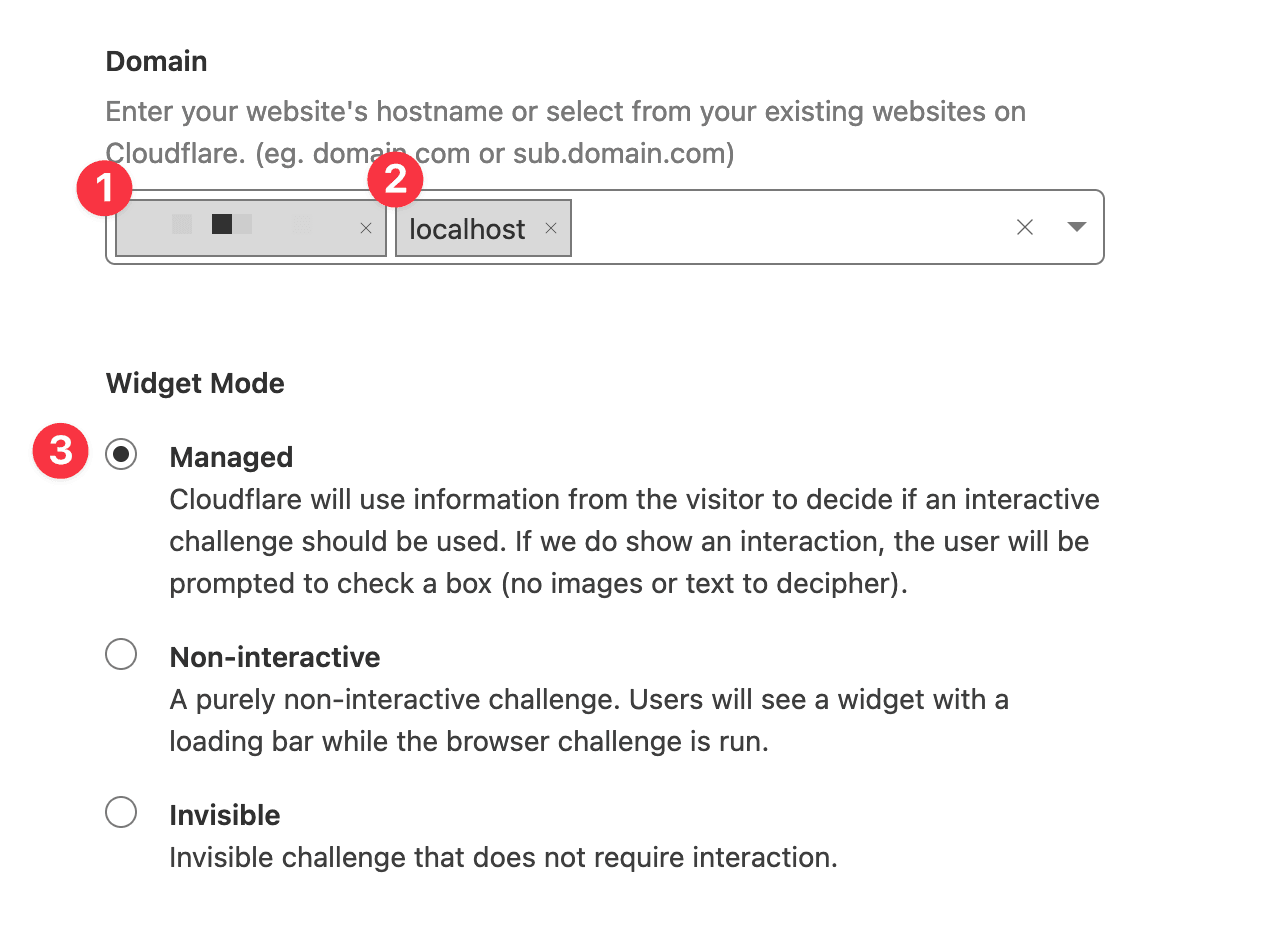
After adding your hostnames, (3) choose "Managed" mode, which is the only Turnstile widget mode available on the free plan.
Lastly, copy your Cloudflare Turnstile site key (public) and secret key:
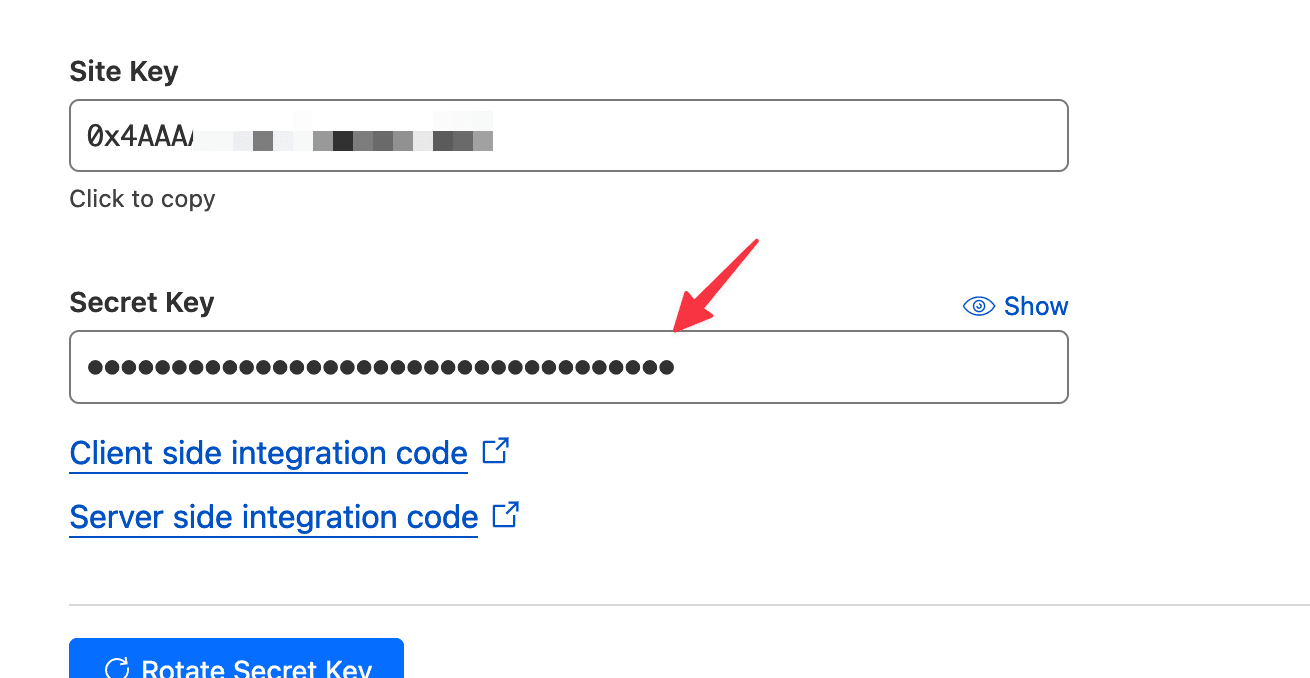
We'll add these keys to our .env.local in our NextJS app:
# Public site key exposed in the frontend NEXT_PUBLIC_TURNSTILE_SITE_KEY=0x4AAAAA••••••••••••••••••• # Secret key, keep secure and never expose in the frontend NEXT_PRIVATE_TURNSTILE_SECRET_KEY=0x4AAAAA•••••••••••••••••••
Now let's integrate Turnstile with a form, so you can see how it works in NextJS.
2. Next.js Client-Side Turnstile Integration
As shown in the Cloudflare docs, the clientside integration with the Turnstile widget is straightforward.
Let's make a form component that utilizes the Turnstile widget:
"use client"; import React from "react"; import Script from "next/script"; export const Form: React.FC<{}> = () => { return ( <form> <input type="email" name="email" id="email" placeholder="Enter your email" /> <!-- Add the Turnstile script using `next/script` --> <Script src="https://challenges.cloudflare.com/turnstile/v0/api.js" async defer ></Script> <!-- Target element for Turnstile CAPTCHA --> <div className="cf-turnstile" data-sitekey={process.env.NEXT_PUBLIC_TURNSTILE_SITE_KEY} data-callback="javascriptCallback" ></div> </form> ); };
To add Cloudflare Turnstile, include the provided script and create a div with the site key and cf-turnstile className where the widget will render.
Cloudflare does not offer an npm package for Turnstile, so we use next/script to include it. There are Typescript type definitions on npm, however.
Next, we'll use NextJS Server Actions to handle validating the CAPTCHA attempt and processing our form.
Server actions are server-side functions that provide an alternative to NextJS API routes, specifically for handling form submissions.
// define a type for managing form state export type FormState = { success: boolean; error: boolean; message: string; } // define an initial form state const initialState: FormState = { success: false, error: false; message: "", } export const Form: React.FC<{}> = () => { const [state, formAction] = useFormState( submitForm, // this will be the server action we will create initialState ); return ( <form action={formAction}> <!-- Same as above --> </form> ); }
We are using the useFormState hook to subscribe to the form state and later render success/error messages upon form submission.
3. Create a Next.js Server Action to handle Turnstile CAPTCHA
Now we'll create the server-side logic to handle Cloudflare Turnstile validation.
Create a file actions.ts at the root of the app directory where we'll define our server action function.
import { FormState } from "@/components/Form"; import { headers } from "next/headers"; export async function submitForm( prevState: FormState, formData: FormData ) { // Destructure form data const email = formData.get("email") as string; const cfTurnstileResponse = formData.get( "cf-turnstile-response" ) as string; // If using a reverse proxy, ensure the X-Real-IP header is enabled to accurately capture the client's original IP address. const ip = headers().get("x-real-ip"); // Create form data for Turnstile verification const verifyFormData = new FormData(); verifyFormData.append( "secret", // Secret key should ONLY be used server-side process.env.NEXT_PRIVATE_TURNSTILE_SECRET_KEY ); verifyFormData.append("response", String(cfTurnstileResponse)); verifyFormData.append("remoteip", String(ip)); // Specify Turnstile URL const url = "https://challenges.cloudflare.com/turnstile/v0/siteverify"; try { // Verify Turnstile using Cloudflare endpoint const result = await fetch(url, { body: verifyFormData, method: "POST", }); const outcome = await result.json(); if (!outcome.success) { // Turnstile failed return { success: false, error: true, message: "Invalid CAPTCHA" }; } // Turnstile success (HTTP 200) return { success: true, error: false, message: "", } } catch (err) { console.log(err); // log / handle error // Request failed return { success: false, error: true, message: "Unable to verify CAPTCHA" } } }
Our server action destructures the form data, prepares and sends a request to Cloudflare's endpoint, and handles the Turnstile verification response.
NoteIf using a reverse proxy to serve your Next.js app, such as with Nginx, make sure to enable the X-Real-IP header in your proxy settings, e.g. "proxy_set_header X-Real-IP $remote_addr;" in your server block.
4. Render the Turnstile Form State
Back in our Form.tsx component, let's render a success and error message:
// import the server action we defined import { submitForm } from "@/app/actions.ts"; // ... rest of imports export const Form: React.FC<{}> = () => { const [state, formAction] = useFormState( submitForm, // this is the server action we just created initialState ); return ( <form action={formAction}> <!-- Submission success --> {state.success === true && ( <div>Success! Thanks for your response</div> )} <!-- Submission error --> {state.error === true && <div>{state.message}</div>} <!-- ... Same as before ... --> </form> ); };
There's one last key step if we plan on using Turnstile on multiple Next.js pages.
We need to force re-render of the Turnstile widget when routing, because of Next.js's hybrid approach to rendering.
5. Force Turnstile Re-Render Upon Routing
Next.js uses client-side routing, even when using SSR. The initial page load is rendered on the server, but after the initial page load Next.js can behave like a Single Page Application (SPA).
This SPA-like behavior can mean that using multiple Turnstile widgets on different pages can create unexpected behavior or not load properly.
So we need to force re-render of the Turnstile widget on each page route, like so:
import React, { useEffect } from "react"; import { usePathname } from "next/navigation"; import { submitForm } from "@/app/actions.ts"; export const Form: React.FC<{}> = () => { const [state, formAction] = useFormState( submitForm, initialState ); const pathname = usePathname(); useEffect(() => { // select all turnstiles const turnstileContainers = document.querySelectorAll(".cf-turnstile"); turnstileContainers.forEach((turnstileContainer) => { turnstileContainer.innerHTML = ""; if (window && window.turnstile) { // re-render all turnstiles window.turnstile.render(turnstileContainer, { sitekey: process.env.NEXT_PUBLIC_TURNSTILE_SITE_KEY, callback: "javascriptCallback", }); } }); }, [pathname]); return ( <form action={formAction}> <!-- ... Same as before ... --> </form> ); };
And that's it! Your Turnstile integration with Next.js 14 should be ready to go.
Note that I'm using usePathname since our Form component is a client-component and we can no longer use next/router events for listening to route changes.
Summary
To summarize, here's the steps needed to add Cloudflare Turnstile to NextJS 14 using server actions:
- Create form component and set form action to server action function
- In server action, destructure form data and send request to Cloudflare endpoint to validate Turnstile CAPTCHA attempt
- Render state using
useFormStatehook - (Optional) Force re-render of Turnstile widget on page changes
Hope this helps you protect your forms using Turnstile. Let me know if you have any improvements to this setup or questions.
Join my newsletter for lessons, experiments, and failures in bootstrapping online businesses.
Sign up if you're curious. I’ll only email you if it's actually good.

Meet the Author
Ryan Chiang
Hello, I'm Ryan. I build things and write about them. This is my blog of my learnings, tutorials, and whatever else I feel like writing about.
What I'm currently building →.