Updated
—
9 min read
Three.js - Handling Click Events with Raycasting
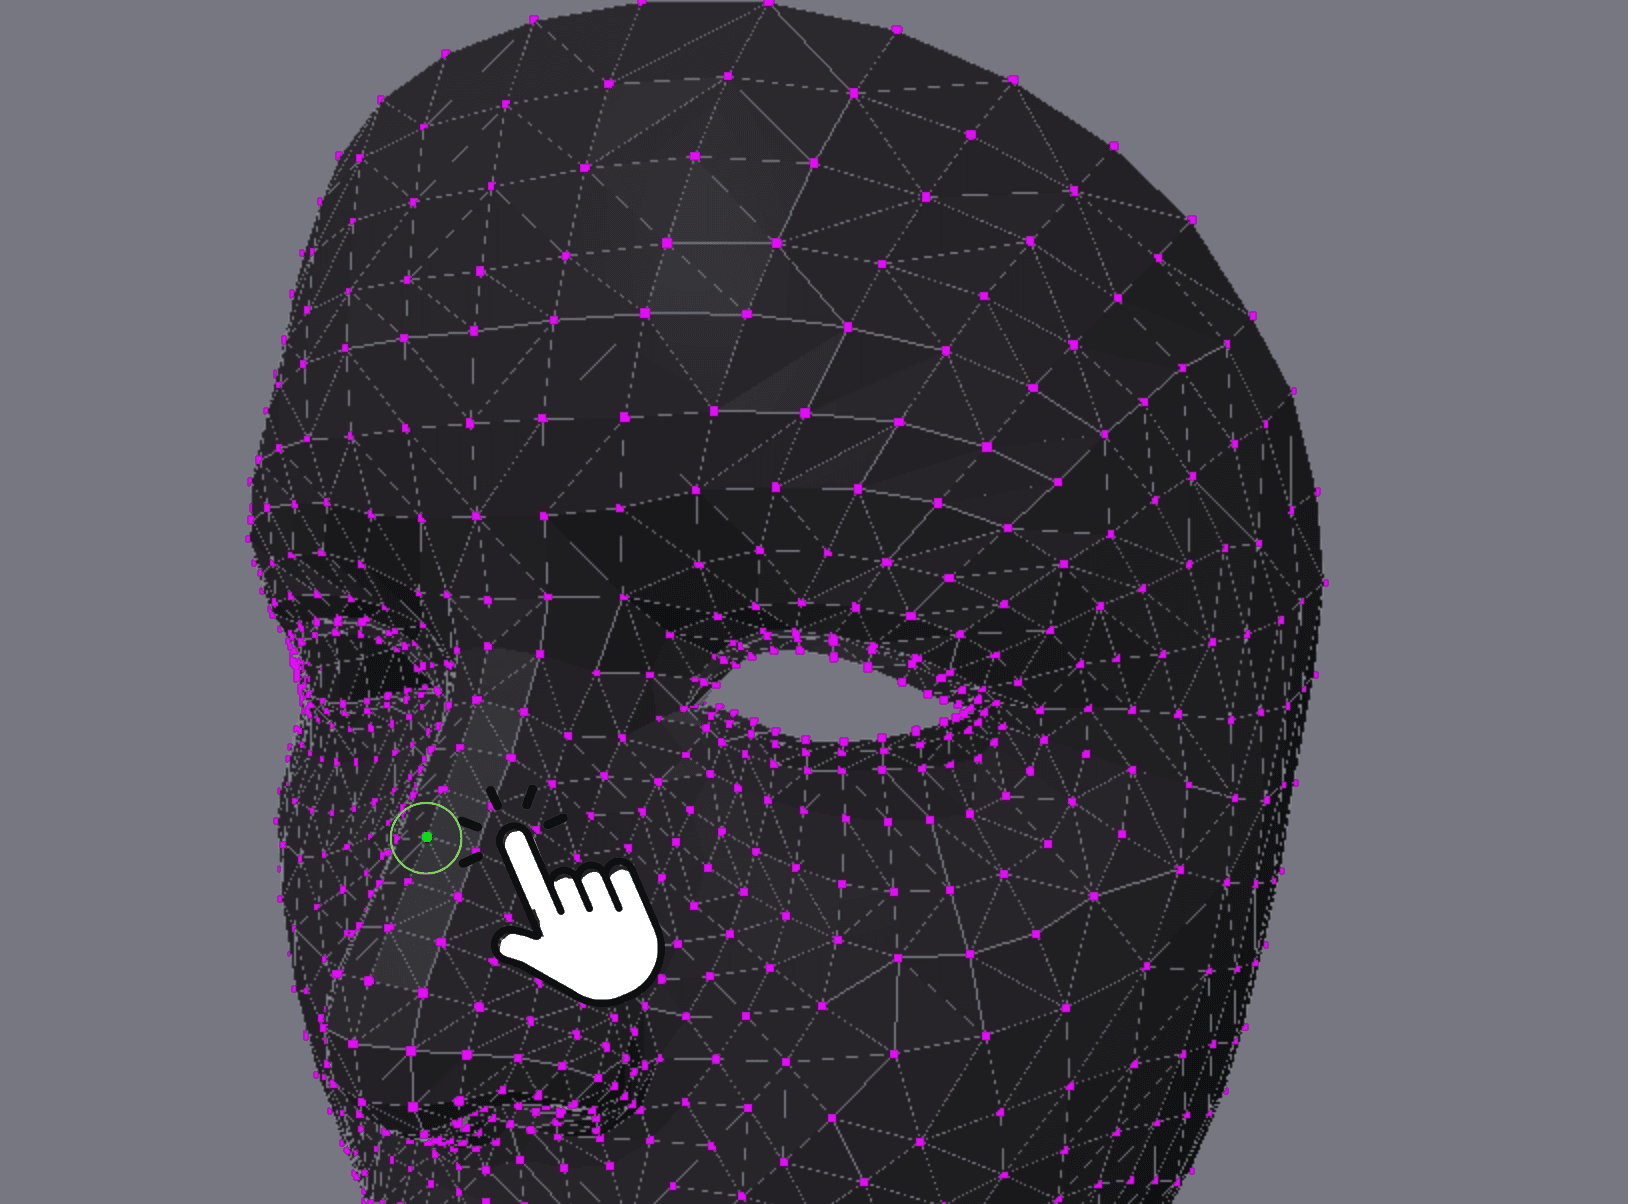
Screenshot of FaceLandmarks.com
Recently I launched FaceLandmarks, a tool for iOS devs working with ARKit to visualize face landmarks in 3D.
The goal? To help iOS devs more easily work with face mesh data and understand how ARKit maps the face mesh to a 3D model.
FaceLandmarks is built with Three.js, a powerful Javascript library that allows you to create 3D scenes in the browser.
You can check out the final result of what we'll build in this tutorial at FaceLandmarks.com.
Why Might You Need to Handle Click Events in Three.js?
One of the core functionalities of FaceLandmarks is the ability to click on a 3D vertex and get the vertex index which comes from the ARKit face mesh mapping.
Three.js, while powerful, does not have built-in support for handling click events on 3D objects.
But it does offer raycasting, a technique that allows you to cast a ray from the camera to the scene and get the 3D coordinates of the intersection point.
In this tutorial, you will learn how to handle click events in Three.js and how to make vertices clickable in Three.js using Raycasting and 3D Euclidean Distance.
Prerequisites
In this project I used React (NextJS) and Typescript. You should also be somewhat familiar with Three.js, although I certainly was not an expert with it when I started this project.
Here's an overview of the steps we'll take to handle click events in Three.js:
- Create a Three.js Scene
- Get the Object Vertices
- Handle Mouse Events
- Create a Raycaster
- Find the Nearest Vertex
- Conclusion
Step 1: Create a Three.js Scene
I won't go into all the details of setting up a Three.js scene, but here's a basic example in React.
In this example, I setup the scene and load a Wavefront (.obj) file using the OBJLoader from the Three.js library.
import * as THREE from "three"; import { OBJLoader } from "three/examples/jsm/Addons.js"; // Blob string of OBJ model // You can also use the file path to the OBJ model const currentModel = "..."; useEffect(() => { // Scene setup const scene = new THREE.Scene(); const camera = new THREE.PerspectiveCamera( 75, // field of view window.innerWidth / window.innerHeight, // aspect ratio 0.01, 10 // far clipping plane ); // Load OBJ model from blob string const loader = new OBJLoader(); const blobString = currentModel; const object = loader.parse(blobString); }, [])
Step 2: Get the Object Vertices
Since our goal is to make the vertices clickable, we'll need to store the positions of all the vertices that make up the OBJ model.
If you're just interested in getting the 3D coordinates of a click event, you can skip this step.
useEffect(() => { // ... previous code // Initialize an empty array to store the vertices let vertices: Array<THREE.Vector3> = []; object.traverse((child) => { if (child instanceof THREE.Points) { const positions = child.geometry.attributes.position; // Loop through all the vertices and store them in the state for (let i = 0; i < positions.count; i++) { const vertex = new THREE.Vector3().fromBufferAttribute(positions, i); vertices.push(vertex); } } }); }, []);
In this snippet, we traverse the loaded object model, check if it's an instance of THREE.Points, and then loop through all the vertices to store them in the vertices array.
The vertices will be stored as a 3-dimensional vector.
Step 3: Handle Mouse Events
Before we handle the onclick event, we want to ensure that the user isn't just panning, rotating, or zooming the camera.
To handle this, we'll add onMouseDown, onMouseUp, and onMouseMove handlers and detect whether the user is dragging or clicking.
// Refs to store the dragging state and mouse position const isDragging = useRef(false); const mouseDownPosition = useRef({ x: 0, y: 0 }); useEffect(() => { // ... previous code function onMouseDown(event: MouseEvent) { // Store the starting position of the mouse mouseDownPosition.current = { x: event.clientX, y: event.clientY, }; isDragging.current = false; // Reset the dragging state } function onMouseMove(event: MouseEvent) { // Calculate the distance the mouse has moved since mouse down const dx = event.clientX - mouseDownPosition.current.x; const dy = event.clientY - mouseDownPosition.current.y; const distance = Math.sqrt(dx * dx + dy * dy); // If the distance is greater than the threshold, set dragging to true const threshold = 5; if (distance > threshold) { isDragging.current = true; } } function onMouseUp(event: MouseEvent) { if (!isDragging.current) { // The mouse did not drag beyond the threshold, so treat this as a click onMouseClick(event); // We'll define this soon } // Reset isDragging for the next mouse down event isDragging.current = false; } // Attach event listeners // Notice how we DON'T have an `onclick` listener // Because this will be triggered via `onMouseUp` instead window.addEventListener("mousedown", onMouseDown); window.addEventListener("mousemove", onMouseMove); window.addEventListener("mouseup", onMouseUp); // Don't forget the cleanup return () => { window.removeEventListener("mousedown", onMouseDown); window.removeEventListener("mousemove", onMouseMove); window.removeEventListener("mouseup", onMouseUp); } }, [])
Here we are tracking the last mouse position and calculating the distance the mouse has moved since the mousedown event.
If the distance is greater than a certain threshold (e.g. 5px), we consider it a drag event.
We add a threshold because sometimes actual click events still move the mouse a few pixels.
Step 4: Create a Raycaster
When onMouseClick is called, we'll want to create a raycaster and cast a ray from the camera to the scene.
This will let us calculate the point where the ray intersects with our 3D object, thereby giving us the 3D coordinates of where the user clicked on the model.
useEffect(() => { // ... previous code function onMouseClick(event: MouseEvent) { // Get mouse position in screen space mouse.x = (event.clientX / window.innerWidth) * 2 - 1; mouse.y = -(event.clientY / window.innerHeight) * 2 + 1; // Initialize a variable to store the hits (intersections) let hits: THREE.Intersection[] = []; raycaster.setFromCamera(mouse, camera); // Raycast to single object hits = raycaster.intersectObject(mesh, true); // If you have multiple objects, you can pass an array of objects to intersectObjects // hits = raygun.intersectObjects([myTargetObect, myTargetObect2]); drawRay(raycaster); // Run if we have intersections if (hits.length > 0) { const coords = hits[0].point; // THREE.Vector3 // We have the 3D coordinates of the click event! // Here you can use these coordinates to do something // In my case, we'll find the nearest vertex index const { index, position } = findNearestVertexIndex( hits[0].point ); // Do something with the vertex index // Such as highlighting the vertex or displaying information } } // ... don't forget to cleanup the listeners here }, []);
This code creates a ray from the camera position to the mouse position.
I've added a function drawRay which visualizes the ray in the scene. This is helpful for debugging and understanding how the raycasting works.
Here's what we have so far:
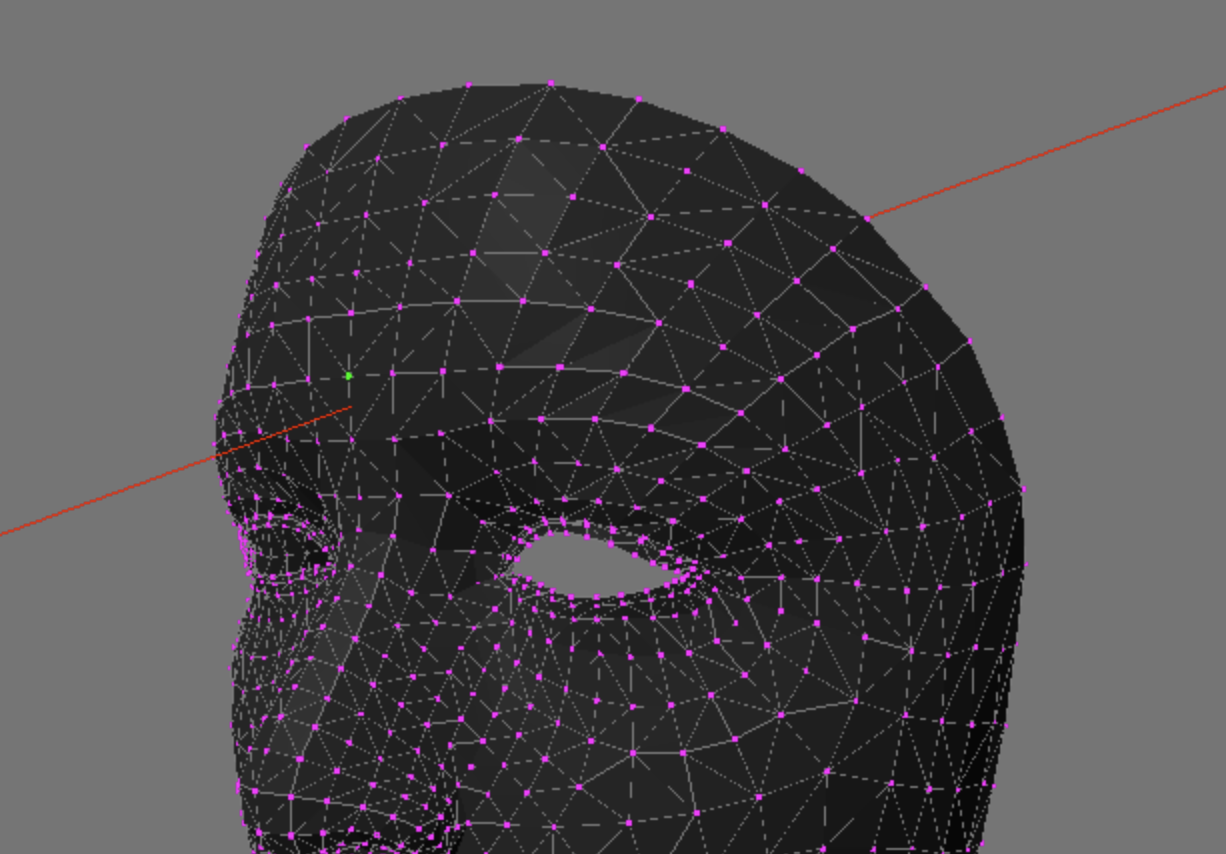
You can see the red line which represents the ray from the camera to the scene.
And we now have the 3D coordinates of the intersection point where the ray hits the object!
From here, you can use these coordinates however you like. In my case, I wanted to find the nearest vertex to the intersection point.
Drawing the Ray
For debugging, I wanted to visualize the ray. Here's a function to draw a red line representing the ray:
function drawRay(raycaster: THREE.Raycaster) { // Remove the previous line if it exists const prevLine = scene.getObjectByName("rayLine"); if (prevLine) { scene.remove(prevLine); } // The raycaster.ray contains the origin and direction const origin = raycaster.ray.origin; const direction = raycaster.ray.direction .clone() .multiplyScalar(100); // Extend the direction const end = origin.clone().add(direction); const geometry = new THREE.BufferGeometry().setFromPoints( [origin, end] ); const material = new THREE.LineBasicMaterial({ color: 0xff0000, // Make it RED }); const line = new THREE.Line(geometry, material); line.name = "rayLine"; // Name the line for easy reference scene.add(line); }
Step 5: Find the Nearest Vertex
By this point, you'll have the 3D coordinates of the user's click event in your scene.
My goal was to get the nearest vertex to the click point, to create the effect of "clicking on a vertex."
Remember how we stored all the vertex coordinates in vertices earlier? We'll now use vertices and simple 3D Euclidean distance to find the nearest vertex to the click position.
useEffect(() => { // ... previous code function findNearestVertexIndex(point: THREE.Vector3) { const { x: x0, y: y0, z: z0 } = point; let minDistance = Infinity; let nearestVertexIndex = -1; let position = new THREE.Vector3(); for (let i = 0; i < vertices.length; i++) { const vertex = vertices[i]; const { x: x1, y: y1, z: z1 } = vertex; const distance = Math.sqrt( Math.pow(x1 - x0, 2) + Math.pow(y1 - y0, 2) + Math.pow(z1 - z0, 2) ); if (distance < minDistance) { minDistance = distance; nearestVertexIndex = i; } } try { position = new THREE.Vector3( vertices[nearestVertexIndex].x, vertices[nearestVertexIndex].y, vertices[nearestVertexIndex].z ); } catch (err) { // Handle error console.log(err); } return { position, index: nearestVertexIndex, }; } // Use `findNearsetVertexIndex` in the `onMouseClick` function function onMouseClick(event: MouseEvent) { // ... same as before // Run if we have intersections if (hits.length > 0) { const coords = hits[0].point; // THREE.Vector3 const { index, position } = findNearestVertexIndex(coords); console.log("Nearest vertex index:", index); } } // ... don't forget to cleanup the listeners here }, []);
And that's it! You now have the nearest vertex index to the click event.
Or, you can handle the vertex click however you like.
In my case with FaceLandmarks, I used this technique to highlight the clicked vertex and display information about the vertex to help iOS devs easily identify specific landmarks from ARKit's 1,220 face mesh vertices.
But this technique of handling click events in Three.js can be used for a wide range of applications.
Wrapping Up
Hopefully this gives you some insight into how to use raycasting to get the 3D coordinates of click events in Three.js, as well as how to make vertices clickable in Three.js.
If you have any questions, feel free to reach out to me on Twitter.
And to see the final demo, check out FaceLandmarks.com.
Join my newsletter for lessons, experiments, and failures in bootstrapping online businesses.
Sign up if you're curious. I’ll only email you if it's actually good.

Meet the Author
Ryan Chiang
Hello, I'm Ryan. I build things and write about them. This is my blog of my learnings, tutorials, and whatever else I feel like writing about.
What I'm currently building →.